Picnic Charcuterie Platter
|
Getting your Trinity Audio player ready...
|
When the sun starts shining in late spring, my wife Evelyn and I immediately reach for the picnic basket. We have two daughters, ages 19 and 15, and finding a meal everyone likes can sometimes feel like a puzzle. However, the one thing that always brings a smile to their faces is a Picnic Charcuterie Platter.
I remember one specific Saturday last July when we drove out to the lake. The girls were arguing about music, and Evelyn was busy organizing the sunscreen. I pulled out a beautifully arranged Picnic Charcuterie Platter, and suddenly, the bickering stopped.
We sat on our old red checkered blanket and enjoyed the fresh air. For me, food is love, and nothing says love like sharing a variety of delicious snacks under a big oak tree. This Picnic Charcuterie Platter represents simplicity at its finest.
You do not need to spend hours over a hot stove to create a memorable meal. Instead, you focus on high-quality ingredients and thoughtful arrangement. In my 55 years, I have learned that the best memories often involve a Picnic Charcuterie Platter and the people you cherish most.
Whether you head to a local park or just your own backyard, this Picnic Charcuterie Platter provides the perfect focal point for your gathering. We love how it encourages everyone to graze and chat at their own pace. There is no pressure to serve courses or keep things hot.
You simply unpack your Picnic Charcuterie Platter and let the good times roll. It is the ultimate no-stress meal for a busy family.
Why You’ll Love This Picnic Charcuterie Platter Recipe
You will love this Picnic Charcuterie Platter because it offers total flexibility. Every family has different tastes, and this format allows you to cater to everyone. My oldest daughter loves spicy flavors, while my youngest prefers mild cheeses.
Consequently, I can customize our Picnic Charcuterie Platter to satisfy both of them perfectly. Furthermore, this recipe requires zero cooking. On a hot summer day, the last thing I want to do is turn on the oven.
You simply slice, wash, and arrange your favorite items. Another reason to love the Picnic Charcuterie Platter is its portability. You can pack everything into containers and assemble it on-site, or you can build it on a board and wrap it tightly.
It fits perfectly into a standard cooler, which makes it ideal for road trips or beach days. Moreover, a Picnic Charcuterie Platter looks incredibly impressive. People often think you spent hours preparing it, but it actually comes together in minutes.
This Picnic Charcuterie Platter also encourages healthy eating habits. You fill it with fresh fruits, lean meats, and nuts. Therefore, you feel energized rather than sluggish after your meal.
Finally, this Picnic Charcuterie Platter facilitates conversation. Since everyone picks at the board together, it creates a communal atmosphere that a seated meal sometimes lacks. It is truly the best way to enjoy a sunny afternoon with your loved ones.
Ingredients You’ll Need
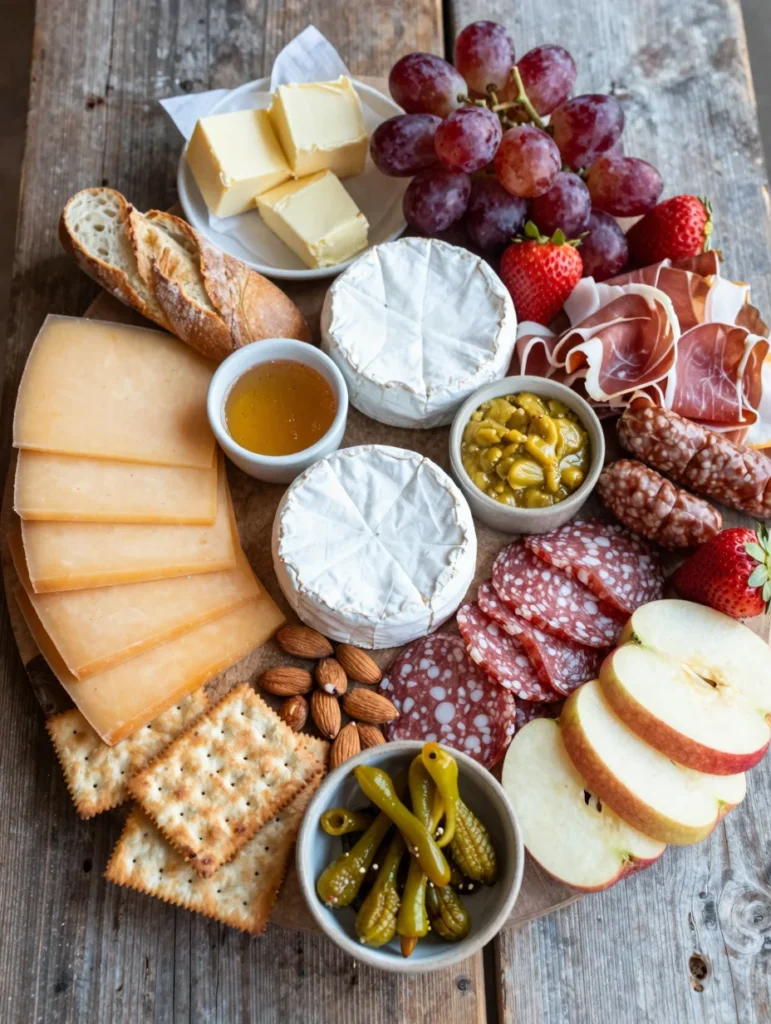
Creating a Picnic Charcuterie Platter starts with choosing a variety of textures and flavors. I always look for a balance of salty, sweet, creamy, and crunchy elements. For our family, I typically select three types of cheese and two or three types of meat.
This variety ensures that every bite feels new and exciting. Additionally, I include plenty of fresh produce to keep the Picnic Charcuterie Platter light and refreshing. Evelyn always insists on high-quality grapes, as they provide a wonderful burst of sweetness against the salty meat.
I also add a selection of crackers and bread to act as the base for our creations. Specifically, I look for items that hold up well during transport. You do not want delicate crackers that turn into dust in your picnic bag.
Instead, choose sturdy options that can handle a thick slice of cheddar. Below is a table of the core ingredients I use for a standard Picnic Charcuterie Platter.
| Category | Ingredient Item | Suggested Amount |
|---|---|---|
| Cheeses | Sharp Cheddar, Creamy Brie, Goat Cheese | 4 oz each |
| Meats | Salami, Prosciutto, Summer Sausage | 3 oz each |
| Fruits | Red Grapes, Strawberries, Apple Slices | 1 cup each |
| Crunchy Items | Water Crackers, Baguette Slices, Almonds | As needed |
| Condiments | Honey, Dijon Mustard, Cornichons | 2 tbsp each |
| Extras | Dried Apricots, Dark Chocolate Chunks | 1/4 cup each |
Substitutions & Variations
The beauty of a Picnic Charcuterie Platter lies in its adaptability. If someone in your family has a nut allergy, simply swap the almonds for roasted chickpeas or sunflower seeds. Similarly, you can easily create a vegetarian Picnic Charcuterie Platter by removing the meats and adding more marinated vegetables.
I often include roasted red peppers, artichoke hearts, and olives for a Mediterranean twist. If you prefer a gluten-free Picnic Charcuterie Platter, use rice-based crackers or cucumber slices as your base. My daughters sometimes ask for a “dessert” version of the Picnic Charcuterie Platter.
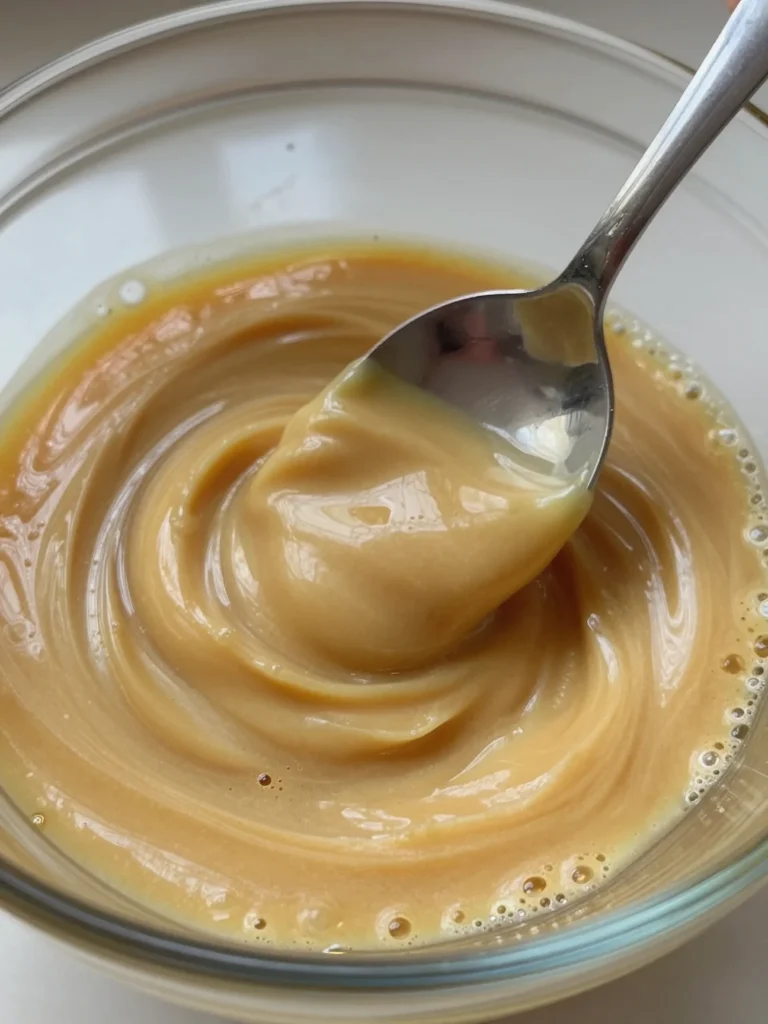
For that variation, I focus on various chocolates, berries, and sweet dips like marshmallow fluff or hazelnut spread. You can also adjust the Picnic Charcuterie Platter based on the season. In the autumn, I use sliced pears, walnuts, and pumpkin seeds.
During the winter, I might include heavier cheeses and smoked meats. If you want a more budget-friendly Picnic Charcuterie Platter, look for bulk packs of cheese and deli meats at your local grocery store. You do not need expensive artisanal products to make a Picnic Charcuterie Platter taste great.
In fact, a simple block of store-brand cheddar often disappears first when I serve this to my family. Just focus on fresh ingredients, and your Picnic Charcuterie Platter will always be a hit.
If you’re looking to add a sweet touch to your picnic, consider making some Blueberry Crumble Bars. They are a delightful complement to the savory flavors of your Picnic Charcuterie Platter, making your outing even more enjoyable. Blueberry Crumble Bars
Step-by-Step Instructions
Building your Picnic Charcuterie Platter is a fun and creative process. First, I choose the right surface. If we are eating at home, I use a large wooden board.
For a picnic, I often use a flat plastic container with a lid to keep the Picnic Charcuterie Platter secure. Start by placing your small bowls on the board first. These bowls will hold your wet ingredients like honey, mustard, or olives.
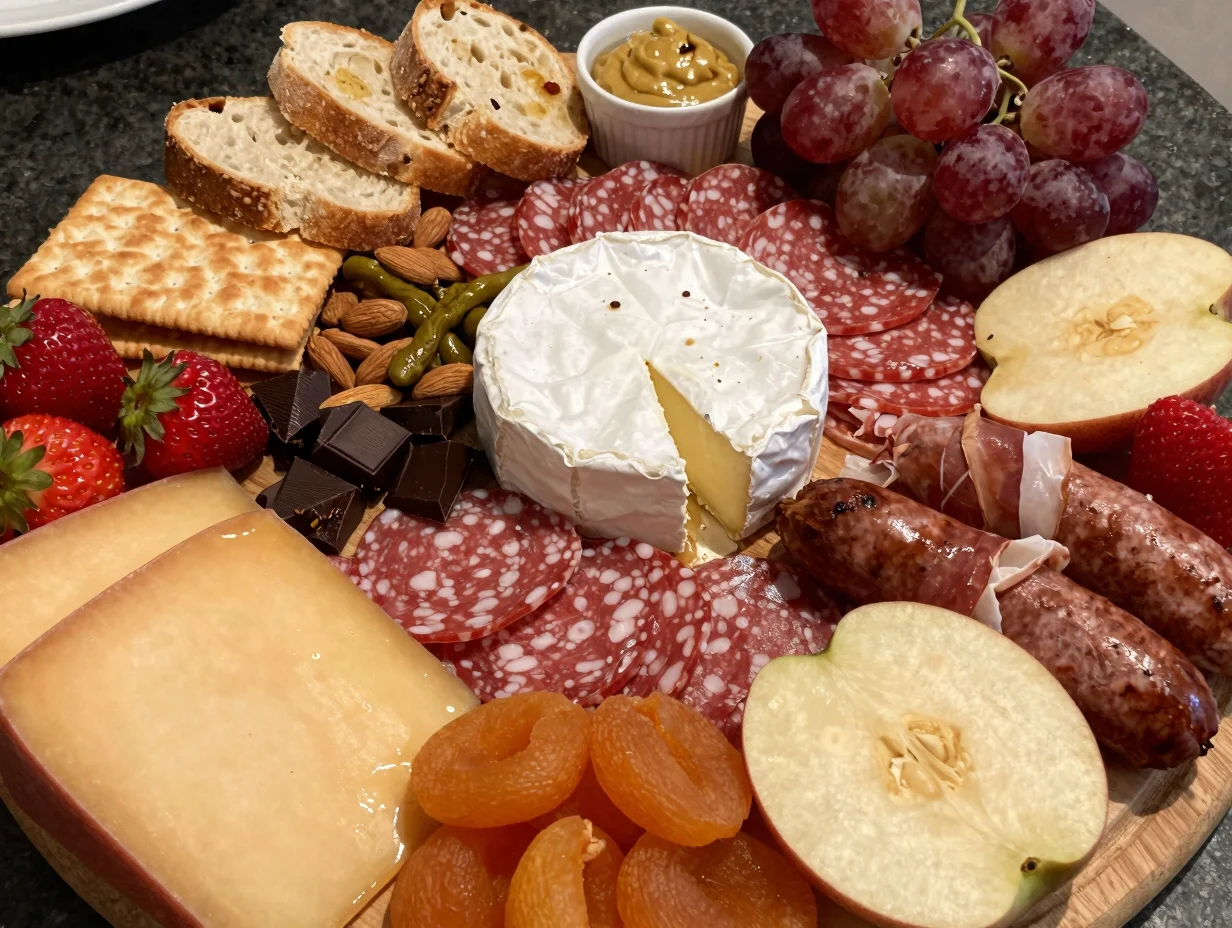
This prevents the moisture from ruining your crackers. Next, place your cheeses. I like to keep the Brie whole but slice the cheddar into bite-sized cubes.
This variety in shapes makes the Picnic Charcuterie Platter look more professional. After the cheese, add your meats. I recommend folding the prosciutto into ribbons and fanning out the salami. This technique adds height and texture to the Picnic Charcuterie Platter.
Once the main items are in place, fill the large gaps with your fruits and crackers. I usually put the crackers near the cheese for easy access. Finally, use your smaller items like nuts and dried fruits to fill the tiny remaining spaces.
This “full” look is the secret to a stunning Picnic Charcuterie Platter. I always tell my daughters that a Picnic Charcuterie Platter should look like a bounty of food. If you are traveling, I suggest packing the crackers separately.
This keeps them crisp until you are ready to eat. Assemble the rest of the Picnic Charcuterie Platter in your container and chill it until you leave. When you arrive at your picnic spot, simply pull out the crackers and enjoy. This method ensures your Picnic Charcuterie Platter remains fresh and appetizing regardless of the heat.
Pro Tips for Success
To ensure your Picnic Charcuterie Platter stays perfect, follow these simple tips. First, keep your items cold. Use a high-quality cooler with ice packs to maintain the temperature of the meats and cheeses.
A warm Picnic Charcuterie Platter can lose its appeal quickly in the summer sun. Second, consider the “moisture barrier.” If you put juicy grapes right next to dry crackers, the crackers will get soggy. Therefore, I place a small piece of parchment paper between wet and dry items on my Picnic Charcuterie Platter.
Third, slice your harder cheeses before you leave home. This makes it much easier for everyone to grab a piece without needing a knife at the picnic.
Another tip involves the bread. If you include a baguette on your Picnic Charcuterie Platter, wait to slice it until you are ready to eat. This prevents the bread from drying out and becoming hard.
Furthermore, I always bring a small trash bag and some wet wipes. A Picnic Charcuterie Platter can get a bit sticky, especially with honey or fruit juice. Additionally, think about the wind.
If you use lightweight napkins or thin crackers, they might blow away. I often use the weight of the cheese or a small rock to keep everything in place on the Picnic Charcuterie Platter. Lastly, do not overthink the arrangement.
The best Picnic Charcuterie Platter looks natural and inviting, not perfectly stiff. Just enjoy the process of creating something beautiful for your family.
To keep your Picnic Charcuterie Platter fresh and appealing, check out these tips on maintaining the right temperature and moisture balance. For a delicious dessert option that pairs well with your platter, try making Key Lime Pie Bars. Key Lime Pie Bars
Storage & Reheating Tips
Since a Picnic Charcuterie Platter consists of fresh items, you should handle leftovers carefully. I recommend discarding any meat or soft cheese that has sat out in the heat for more than two hours. However, if you kept your Picnic Charcuterie Platter in a cooler, you can save most of the items.
I pack the leftover cheeses and meats into airtight containers and store them in the refrigerator. You should consume them within three days for the best quality. Interestingly, a Picnic Charcuterie Platter does not require any reheating.
We enjoy these items cold or at room temperature. If you have leftover bread from your Picnic Charcuterie Platter, you can toast it the next day for breakfast.
I often use the leftover bits of cheese and meat from our Picnic Charcuterie Platter to make a delicious omelet or a quick pasta salad. This way, nothing goes to waste. If you have leftover nuts or dried fruits, simply put them back in the pantry.
To keep your crackers fresh, ensure you seal them in a zip-top bag. If they do lose their crunch, you can crisp them up in a low oven for a few minutes. However, the fresh components of the Picnic Charcuterie Platter always taste best on the day you prepare them. I always try to portion our Picnic Charcuterie Platter accurately so we have minimal leftovers to worry about.
What to Serve With This Recipe
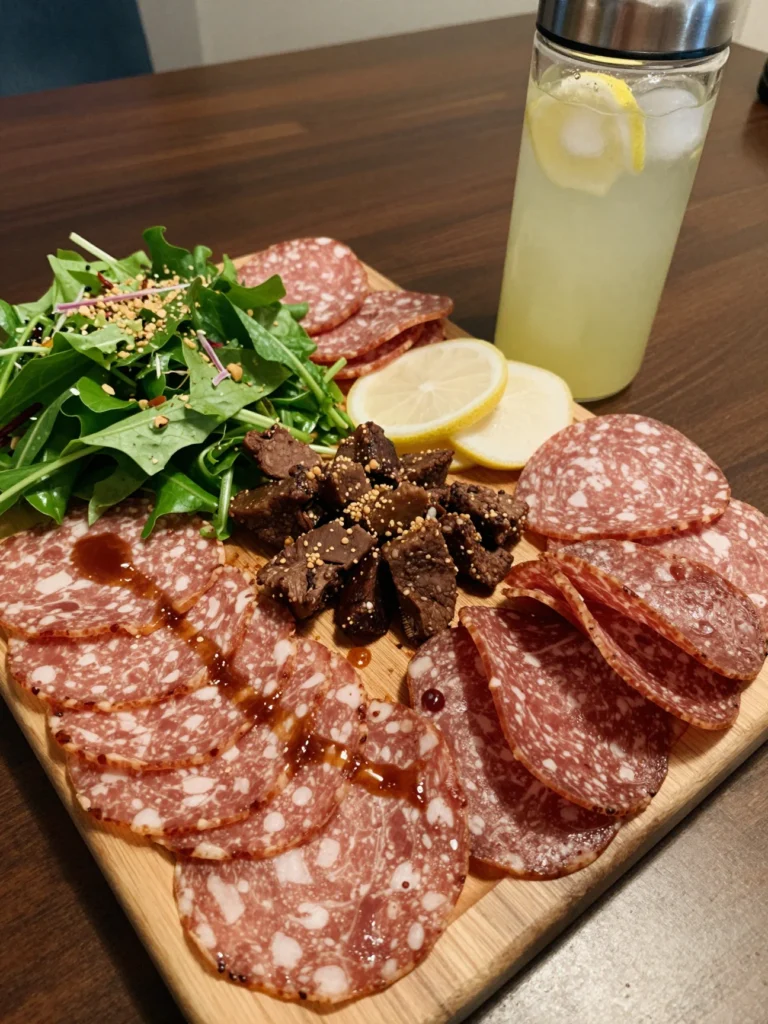
A Picnic Charcuterie Platter is a complete meal on its own, but you can certainly add a few extras. I usually bring a large thermos of ice-cold lemonade or sparkling water with lemon slices. This provides a refreshing contrast to the rich flavors of the Picnic Charcuterie Platter.
If Evelyn and I are enjoying a quiet afternoon, we might bring a crisp bottle of white wine or a light rosé. These drinks pair beautifully with the salty meats and creamy cheeses on the Picnic Charcuterie Platter. Additionally, a simple green salad with a light vinaigrette makes a great side dish. It adds a bit of crunch and acidity to the meal.
If you want something heartier, consider bringing a container of pasta salad or a potato salad. These items complement the Picnic Charcuterie Platter without overshadowing it. For dessert, I usually rely on the fruit already on the board.
However, a batch of homemade brownies or chocolate chip cookies is always a welcome addition. My girls love it when I bring a separate container of dip, like hummus or spinach artichoke dip, to go with the extra crackers from our Picnic Charcuterie Platter. No matter what you choose, keep it simple.
The goal of a Picnic Charcuterie Platter is to minimize work and maximize enjoyment. Focus on items that you can eat with your hands to keep the picnic vibe alive.
While your Picnic Charcuterie Platter is a meal in itself, adding a refreshing drink can enhance the experience. Consider pairing it with Honey Peach Hand Pies for a sweet finish to your picnic. Honey Peach Hand Pies
Nutrition Information (per serving)
Nutritional values for a Picnic Charcuterie Platter can vary based on your specific choices. However, I have calculated an average for a single serving based on a standard mix of ingredients. This helps you keep track if you are mindful of your intake. Remember that a Picnic Charcuterie Platter is meant to be enjoyed, so do not stress too much about the numbers!
| Nutrient | Amount Per Serving |
|---|---|
| Calories | 450 kcal |
| Total Fat | 28g |
| Saturated Fat | 12g |
| Cholesterol | 55mg |
| Sodium | 850mg |
| Total Carbohydrates | 30g |
| Dietary Fiber | 4g |
| Sugars | 12g |
| Protein | 18g |
FAQs
How do I pack a Picnic Charcuterie Platter for travel?
To pack a Picnic Charcuterie Platter, I recommend using a container with divided sections. This keeps the items from sliding around during the drive. Place the cheeses and meats in the cooler first to keep them at the bottom where it is coldest.
I always pack the crackers in a separate, airtight bag to ensure they stay crisp. If you are using a wooden board, wrap it tightly in plastic wrap and then aluminum foil to keep everything in place.
What are the best cheeses for an outdoor Picnic Charcuterie Platter?
For an outdoor Picnic Charcuterie Platter, choose firmer cheeses that do not melt instantly. Aged cheddar, gouda, and manchego are excellent choices. They hold their shape well even if the temperature rises slightly.
I still love to include a soft cheese like Brie on my Picnic Charcuterie Platter, but I keep it in its rind to prevent it from spreading too much. Avoid very soft or liquidy cheeses unless you have a very cold cooler.
Can I make a Picnic Charcuterie Platter the night before?
Yes, you can certainly prep your Picnic Charcuterie Platter the night before. I suggest slicing the cheeses and meats and storing them in separate containers. This prevents the flavors from mingling too much overnight.
You can also wash and dry your fruit ahead of time. I recommend waiting until the morning of your trip to assemble the Picnic Charcuterie Platter and add the crackers. This ensures everything stays as fresh and delicious as possible for your picnic.
How much food should I plan per person for a Picnic Charcuterie Platter?
When I plan a Picnic Charcuterie Platter for a full meal, I aim for about 3 to 4 ounces of meat and 3 to 4 ounces of cheese per person. If the Picnic Charcuterie Platter is just an appetizer, you can reduce that to 2 ounces of each.
I also make sure to have plenty of “fillers” like bread, crackers, and fruit to ensure no one leaves the picnic hungry. My family usually eats quite a bit, so I always lean towards bringing a little extra.
How do I keep bugs away from my Picnic Charcuterie Platter?
Bugs can be a challenge when enjoying a Picnic Charcuterie Platter outdoors. I use mesh food covers to protect the board while we are not actively reaching for a snack. Additionally, I avoid bringing overly sugary drinks that might attract bees or ants.
If you keep the Picnic Charcuterie Platter in a lidded container, you can simply pop the lid back on between bites. This simple step keeps your food clean and your family happy throughout the afternoon.
Picnic Charcuterie Platter
Ingredients
Method
- Choose a large wooden board or flat plastic container for assembly.
- Place small bowls for wet ingredients like honey and mustard on the board.
- Arrange cheeses, keeping Brie whole and slicing cheddar into cubes.
- Add meats, folding prosciutto and fanning out salami for presentation.
- Fill gaps with fruits and crackers, placing crackers near cheese.
- Use smaller items like nuts and dried fruits to fill remaining spaces.
Notes
Or browse by category:
As an Amazon Associate I earn from qualifying purchases.