Delicious Lucky Charms Treats: Easy No-Bake Recipe!
|
Getting your Trinity Audio player ready...
|
I’ll never forget the morning my youngest daughter, Sofia, then seven years old, discovered I had used her beloved Lucky Charms cereal to make treats for her sister’s school bake sale. The look of betrayal! Fast forward eight years, and now she’s the one requesting these lucky charms treats every single weekend.
Mateo and I have perfected this recipe over the years, tweaking ratios and adding our own special touches. These colorful, marshmallow-packed bars have become our family’s go-to dessert for everything from birthday parties to random Tuesday afternoons when we need a little magic in our lives. If you’re looking for a simple, no-bake recipe that brings smiles to every face, these lucky charms treats are absolutely the answer.
What started as a quick substitute for traditional rice crispy treats has transformed into something our whole family treasures. The combination of that iconic cereal with gooey marshmallow creates a nostalgic, whimsical dessert that tastes like childhood in the best possible way. Plus, making lucky charms treats takes less than fifteen minutes from start to finish, which makes them perfect for busy moms like me who still want to create something special.
Why You’ll Love These Lucky Charms Treats
These lucky charms treats check every box for a winning recipe. First, they’re incredibly easy to make, seriously, if you can melt butter and stir, you’ve got this. Second, they require only three basic ingredients that you probably already have in your pantry. Third, kids absolutely adore them, which means you’ll become the hero of any gathering.
Moreover, these treats are endlessly customizable. You can add chocolate chips, drizzle white chocolate on top, or even mix in sprinkles for extra fun. Mateo loves to experiment by adding a pinch of sea salt on top, which creates an amazing sweet-and-salty combination. Additionally, lucky charms treats transport beautifully, making them ideal for school lunches, potlucks, or bake sales.
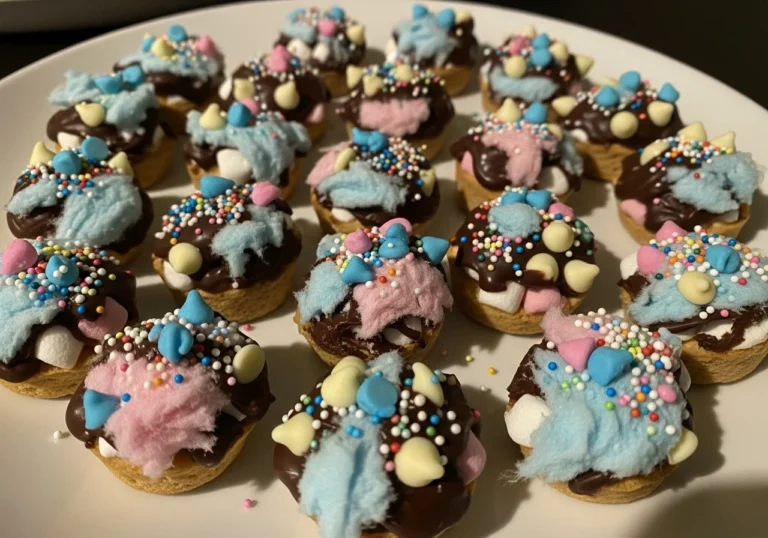
Unlike many desserts that require precision and baking skills, these bars are forgiving. They come together quickly, don’t require an oven, and always turn out perfectly. Furthermore, the vibrant colors from the marshmallow pieces make these lucky charms treats visually stunning, they practically beg to be photographed and shared.
Ingredients You’ll Need
The beauty of lucky charms treats lies in their simplicity. You only need three main ingredients to create these magical bars. Here’s exactly what you’ll need:
| Ingredient | Quantity | Notes |
|---|---|---|
| Unsalted butter | 3 tablespoons | Brings richness and helps bind everything |
| Mini marshmallows | 4 cups (or one 10-oz bag) | Creates the gooey, sticky base |
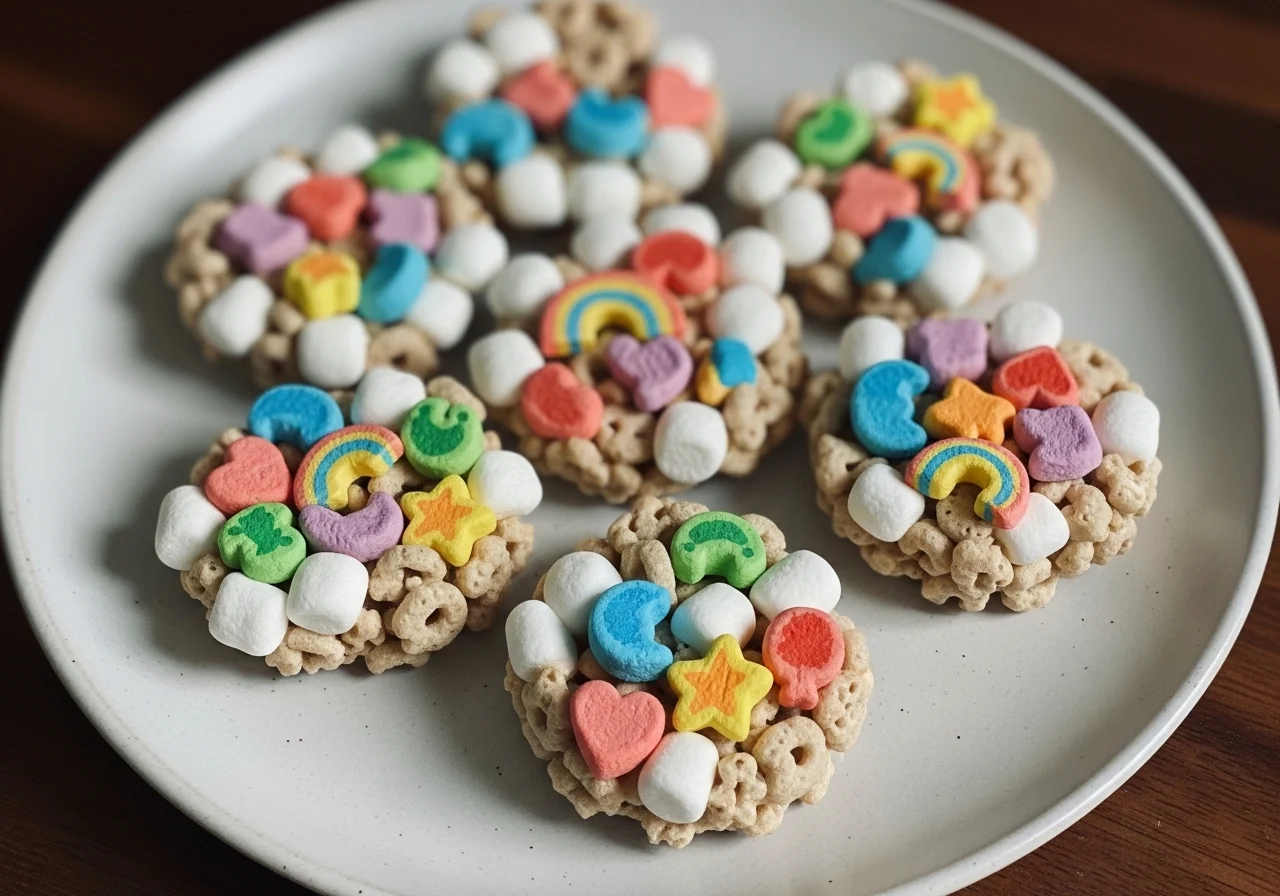
| Lucky Charms cereal | 6 cups | The star ingredient with magical marshmallows |
| Vanilla extract (optional) | 1 teaspoon | Enhances overall flavor |
| Salt (optional) | Pinch | Balances sweetness |
When making lucky charms treats, I always use unsalted butter so I can control the salt level. Fresh marshmallows matter too, stale ones won’t melt as smoothly. As for the cereal, make sure it’s fresh and crunchy for the best texture.
Substitutions & Variations
One reason I love lucky charms treats is their versatility. You can easily customize them to suit your preferences or dietary needs.
Butter alternatives: Use vegan butter or coconut oil if you’re avoiding dairy. Both work beautifully and maintain that rich flavor.
Marshmallow options: Try using marshmallow fluff instead of mini marshmallows. You’ll need about 3 cups of fluff. Vegan marshmallows also work perfectly for plant-based diets.
Mix-ins: Add chocolate chips, M&Ms, or mini peanut butter cups for extra indulgence. Sofia loves when I fold in white chocolate chips. Mateo sometimes adds crushed graham crackers for interesting texture.
Flavor variations: Add a tablespoon of cocoa powder to the melted marshmallow mixture for chocolate lucky charms treats. Alternatively, stir in a teaspoon of almond extract instead of vanilla for a different flavor profile.
Toppings: Drizzle melted chocolate over cooled bars, sprinkle with extra Lucky Charms marshmallows, or dust with edible glitter for special occasions.
Step-by-Step Instructions
Making lucky charms treats couldn’t be simpler. Follow these easy steps for perfect results every time.
Step 1: Prepare your pan. Line a 9×13-inch baking pan with parchment paper, leaving overhang on the sides for easy removal. Lightly spray with cooking spray. This prevents sticking and makes cutting so much easier.
Step 2: Melt the butter. In a large pot over medium-low heat, melt the butter completely. Don’t rush this step, medium-low heat prevents burning.
Step 3: Add marshmallows. Pour the mini marshmallows into the melted butter. Stir constantly with a wooden spoon or silicone spatula.
The marshmallows will slowly melt and become smooth and glossy. This takes about 3-5 minutes.
Step 4: Add vanilla. Once marshmallows melt completely, remove from heat. Stir in vanilla extract and a pinch of salt if using. This enhances the flavor of your lucky charms treats significantly.
Step 5: Mix in cereal. Immediately add the Lucky Charms cereal to the marshmallow mixture. Fold gently but thoroughly until every piece gets coated. Work quickly because the mixture starts to set as it cools.
Step 6: Press into pan. Transfer the mixture to your prepared pan. Using buttered hands or a buttered spatula, press the mixture evenly into the pan. Don’t press too hard, you want the lucky charms treats to stay light and fluffy, not dense.
Step 7: Cool completely. Let the treats sit at room temperature for at least 30 minutes until fully set. Mateo always says patience here makes the difference between perfect bars and crumbly messes.
Step 8: Cut and serve. Lift the entire block out using the parchment overhang. Cut into 12-16 squares using a sharp knife. For cleaner cuts, wipe the knife between each slice.
Pro Tips for Success
After making countless batches of lucky charms treats, I’ve learned several tricks that guarantee success every time.
Use fresh ingredients: Fresh cereal and fresh marshmallows make all the difference. Stale ingredients create tough, hard treats instead of soft, chewy ones.
Don’t overheat: Keep the heat low when melting marshmallows. High heat causes them to get tough and stringy. Low and slow wins this race.
Butter everything: Butter your hands, your spatula, and your knife. These lucky charms treats are sticky, and butter prevents frustrating messes.
Work quickly: Once you add the cereal, move fast. The mixture sets quickly as it cools, making it harder to spread evenly.
Don’t over-press: Pressing too firmly creates dense, hard bars. Gentle pressure maintains that perfect chewy texture we all love.
Customize the ratio: If you want more marshmallow gooeyness, use 5 cups of cereal instead of 6. For crunchier treats, stick with 6 cups or even add a half cup more.
Add color contrast: Save some of the colorful marshmallows from the cereal before mixing, then press them on top of your lucky charms treats for extra visual appeal.
Storage & Reheating Tips
Proper storage keeps your lucky charms treats fresh and delicious for days. Store them in an airtight container at room temperature for up to 3 days. They’ll stay soft and chewy if sealed properly.
For longer storage, keep lucky charms treats in the refrigerator for up to one week. Let them come to room temperature before serving for the best texture. Cold treats become a bit harder, though some people (like Mateo) actually prefer them chilled.
You can also freeze these treats for up to 6 weeks. Wrap individual bars in plastic wrap, then place them in a freezer-safe bag. Thaw at room temperature for about 30 minutes before eating. My girls love grabbing frozen lucky charms treats for a cool summer snack.
Avoid storing them in humid environments, as moisture makes the cereal soggy. Similarly, don’t leave them uncovered, they’ll dry out and become hard.
What to Serve With This Recipe
While lucky charms treats shine as a standalone snack, they pair wonderfully with several accompaniments. Serve them alongside cold milk for a nostalgic after-school treat that kids and adults adore.
For parties, arrange lucky charms treats on a dessert board with fresh fruit, cookies, and brownies. The colorful bars add visual interest and balance richer desserts.
Coffee pairs surprisingly well with these sweet treats. Mateo enjoys them with his morning espresso on weekends. The bitterness of coffee contrasts beautifully with the sweet, marshmallow flavor.
Ice cream makes another excellent partner. Crumble lucky charms treats over vanilla ice cream for an incredible sundae. Or serve whole bars alongside scoops of strawberry or chocolate ice cream.
For birthday parties, stack lucky charms treats into a tower or arrange them on colorful platters. They photograph beautifully and kids go crazy for them.
FAQs
Why are my Lucky Charms treats hard?
Hard lucky charms treats usually result from cooking the marshmallows too long or at too high heat. Use medium-low heat and remove from heat immediately once marshmallows melt. Over-pressing the mixture also creates hard bars, so press gently when spreading in the pan.
Can I use regular marshmallows instead of mini marshmallows?
Absolutely! You can substitute regular marshmallows for mini marshmallows in lucky charms treats. Use about 40 regular marshmallows to equal one 10-ounce bag of mini marshmallows. They’ll take slightly longer to melt, so be patient and stir constantly.
How do I keep Lucky Charms treats from sticking?
Prevent sticking by buttering your hands, spatula, and knife generously. Line your pan with parchment paper and spray it lightly with cooking spray. When cutting lucky charms treats, wipe your knife with a buttered paper towel between cuts for clean edges.
Can I make Lucky Charms treats without butter?
Yes, you can make lucky charms treats without butter using coconut oil or vegan butter as substitutes. Some people even use cooking spray, though butter adds richness and flavor that makes these treats extra special. The texture remains similar with most substitutions.
How long do Lucky Charms treats stay fresh?
When stored properly in an airtight container, lucky charms treats stay fresh for 3 days at room temperature or up to one week refrigerated. They also freeze beautifully for up to 6 weeks. Always ensure they’re completely cool before storing to prevent condensation and sogginess.
Nutrition Information (per serving)
Based on 12 servings:
| Nutrient | Amount |
|---|---|
| Calories | 165 |
| Total Fat | 3g |
| Saturated Fat | 2g |
| Cholesterol | 8mg |
| Sodium | 135mg |
| Total Carbohydrates | 34g |
| Dietary Fiber | 1g |
| Sugars | 16g |
| Protein | 1g |
These lucky charms treats make a sweet indulgence that fits perfectly into balanced eating when enjoyed in moderation. They provide quick energy, making them ideal for active kids or pre-workout snacks. While not health food, they bring joy and create memories, and that counts for something too.
Making lucky charms treats has become one of our favorite family traditions. Whether we’re celebrating something special or just making an ordinary day more magical, these colorful, cheerful bars never disappoint. The best part?
Watching my daughters’ faces light up, just like they did when they were little. That’s the real magic in these treats.
lucky charms treats
Ingredients
Method
- Prepare your pan by lining a 9x13-inch baking pan with parchment paper and lightly spray with cooking spray.
- In a large pot over medium-low heat, melt the butter completely.
- Pour the mini marshmallows into the melted butter and stir constantly until smooth and glossy, about 3-5 minutes.
- Remove from heat and stir in vanilla extract and a pinch of salt if using.
- Add the Lucky Charms cereal to the marshmallow mixture and fold gently until coated.
- Transfer the mixture to the prepared pan and press evenly with buttered hands or a spatula.
- Let the treats sit at room temperature for at least 30 minutes until fully set.
- Lift out using the parchment overhang and cut into squares.
Notes
Or browse by category:
As an Amazon Associate I earn from qualifying purchases.